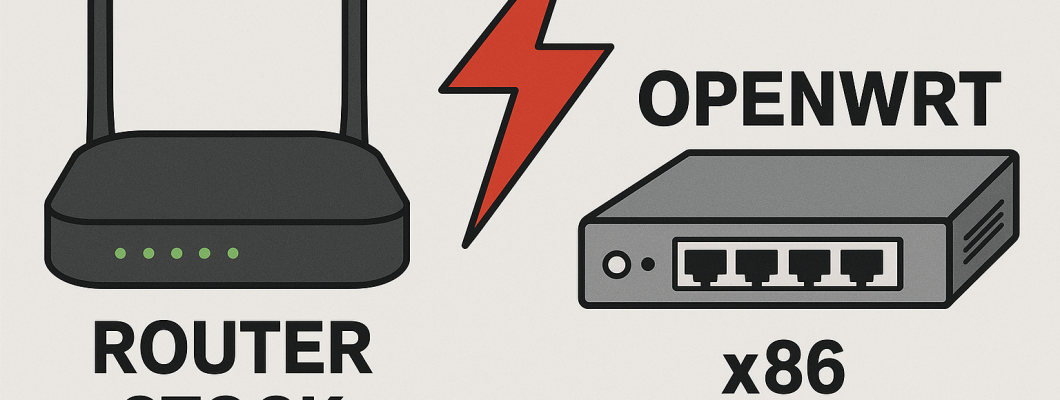
Installing OpenWRT on x86 hardware lets you turn a standard computer into a powerful and highly customizable router and firewall. Unlike commonly available routers or firewalls, where the WAN/LAN ports are fixed and pre-labeled, on an OpenWRT PC you will need to manually identify and assign the physical network interface cards (NICs) to the WAN (external network) and LAN (internal network) roles.This guide will walk you through the basic setup using the LuCI GUI, explaining the basics of the built-in firewall and port mapping in the context of your x86 hardware.
1. Installation and Initial Login on x86 Hardware
Installing OpenWRT on an x86 PC typically involves downloading an x86/x64-specific firmware image and writing this image to a storage device (hard drive, SSD, USB stick) that the PC will boot from. The exact process may vary, but once completed and the PC is booted from the OpenWRT drive, the system will prepare for configuration.
Identifying Network Interface Cards (NICs): The first thing to do is identify the names assigned by the Linux kernel to your physical network cards. They may look like eth0, eth1, enp1s0, enp2s0, etc. If you have a monitor and keyboard connected to your OpenWRT PC, you can use commands like ip addr show or ifconfig in the console to list the interfaces. It is crucial to understand which name corresponds to which physical port on the back of your PC.
Initial Default Network Configuration: By default, OpenWRT will configure one of the detected NICs (often the first one, e.g. eth0) as a logical interface called lan, assigning it the IP address 192.168.1.1 and enabling a DHCP server. This is the port you will initially connect your computer to in order to access the configuration.
Accessing the Web Interface (LuCI):Connect your computer directly, via Ethernet cable, to the physical port of the OpenWRT PC that has been configured as LAN (the one with the address 192.168.1.1).
Make sure that your computer is configured to obtain an IP address automatically (DHCP). It should receive an IP in the 192.168.1.x network.
Open a web browser on your computer and type http://192.168.1.1 in the address bar.
First Login and Password Setup: When you log in for the first time, LuCI will ask you to set a password for the root user. This is a critical step for security; choose a strong password.
Once you have set the password, you will be able to access the full LuCI interface.
2. Configuring Network Interfaces: Binding Logical and Physical on x86
In OpenWRT, you work with logical interfaces (wan, lan, etc.) that you then bind to your physical network cards (NICs) or groups of them. In the Network -> Interfaces menu, you will see the logical interfaces preconfigured or that you will create.
On x86 hardware, the key difference is that you must explicitly tell OpenWRT which physical NIC to use for each logical interface.
Standard Logical Interfaces:
lan: This logical interface represents your local network. By default it is a bridge (br-lan) that can include one or more physical NICs (your LAN ports). It has the internal IP address and handles DHCP for your devices.
wan: This logical interface represents the external network (Internet). It must be bound to the physical NIC connected to your modem/ONT. It will handle the Internet connection (e.g. PPPoE, DHCP Client, Static IP) and will have the public IP address.
Example: Configuring a PPPoE Connection on Your Designated WAN NIC
Let's say you identified eth0 as your LAN NIC and eth1 as your WAN NIC.
In the Network -> Interfaces menu, locate the logical interface called wan.
If it doesn't exist, click the Add new interface... button and create a new interface called wan.
Choose the "PPPoE" protocol and click Create interface.
If wan already existed with another protocol, click Edit next to it, change the Protocol to "PPPoE" and click Switch protocol.
In the General Settings tab for the wan interface with PPPoE protocol:
Enter the "PAP/CHAP username" and "PAP/CHAP password" provided by your ISP.
The "Service Name" field is usually optional.
WAN Physical NIC Association (x86 Specific): Switch to the Physical Settings tab.
Here you will see the list of physical NICs available in your PC (e.g. eth0, eth1).
Select the checkbox next to the name of the physical NIC you have chosen to use as the WAN (in our example, eth1). Make sure that it is the only interface selected in this section for the WAN.
The Advanced Settings, Firewall Settings and DHCP Server tabs for the WAN are usually pre-configured correctly.
Click Save and then Save & Apply.
The OpenWRT PC will now attempt to connect to the Internet via the physical NIC eth1 using PPPoE credentials. You can check the status in Status -> Overview.
LAN Interface Configuration (x86 Specific):
It is important to make sure that the logical lan interface is associated with the correct physical NICs you want to use for your internal network.
In the Network -> Interfaces menu, locate the lan interface (by default it is a bridge, br-lan). Click Edit.
In the Physical Settings tab:
Make sure that the Bridge interfaces option is selected.
In the list of available interfaces, select the checkboxes next to the names of the physical NICs you want to include in your LAN (in our example, eth0). If you have multiple physical ports to use as LAN, select all of them here (e.g. eth0, eth2).
In the General Settings tab, you can change the IPv4 address of OpenWRT on the LAN (e.g. from 192.168. 1.1 to 192.168. 10.1), the network mask (IPv4 netmask). If you change the IP, you will need to reconnect your computer to the new address in the browser.
In the DHCP Server tab, you can configure the range of IP addresses that OpenWRT will assign to devices on the LAN.
Click Save and Save & Apply.
Assigning Physical NICs to Logical Interfaces:
As shown above, the basic step on x86 is to map your physical NICs (e.g. eth0, eth1) to the OpenWRT logical interfaces (lan, wan). The lan interface is typically a bridge (br-lan) that includes one or more physical NICs to create the local network. The wan interface is associated with a single physical NIC that faces the Internet.
Once a logical interface (such as br-lan or pppoe-wan) is configured and associated with its physical NICs, OpenWRT will treat them as a single entity for routing and firewall purposes.
3. The Integrated Firewall and Zone Logic
OpenWRT's firewall (firewall4, based on nftables) is a key security component. Its management is based on the concept of Zones, independent of hardware.
What is a Zone? A zone is a logical grouping of interfaces (and therefore their associated physical NICs) that share a similar level of trust. Zones define the default security policies for traffic.
Interaction between Zones: Security is defined by the rules that govern how traffic moves between zones and how traffic to or from the router is handled within each zone.
The default policies for each zone are:
Input: What to do with traffic to the router from interfaces in this zone.
Output: What to do with traffic originating from the router itself that is directed to interfaces in this zone.
Forward: What to do with traffic that passes through the router from an interface in this zone to an interface in another zone.
Default Zones and their Association to Logical Interfaces:
In the Network -> Firewall -> Zones menu, you will find the default zones:
lan Zone:
Associated with the logical interface br-lan (which includes your physical LAN NICs).
Policy: Input: ACCEPT, Output: ACCEPT, Forward: ACCEPT (for forwarding to allowed zones). Allows devices on your LAN (on NICs eth0, etc.) to access the router and forward traffic (to the WAN).
wan Zone:
Associated with the logical interface pppoe-wan (which uses your physical WAN NIC, eth1).
Policy: Input: REJECT or DROP, Output: ACCEPT, Forward: REJECT or DROP (for forwarding to untrusted zones). Blocks unsolicited traffic from the Internet (from the eth1 NIC) to the router or the LAN.
Inter-Zone Traffic Rules (Inter-Zone Forwarding):
These rules define how traffic can move between zones:
lan -> wan: Traffic from the lan zone (your devices on the eth0 NIC) to the wan zone (the Internet via the eth1 NIC) is allowed (Forward: ACCEPT). NAT is applied.
wan -> lan: Traffic from the wan zone (the Internet via the eth1 NIC) to the lan zone (your devices on the eth0 NIC) is blocked by default (Forward: REJECT or DROP).
In short: associating your physical NICs to logical lan and wan interfaces, and assigning these interfaces to their respective lan and wan zones is how the OpenWRT firewall applies its security rules to your specific x86 hardware.
4. Port Forwarding (NAT) and its Interaction with Firewall
Port Forwarding (or NAT) allows you to make a service running on a specific device in your LAN (on your LAN physical NICs) accessible from the Internet (via your WAN physical NIC and public IP address). This is necessary because the default wan -> lan policy blocks all unsolicited incoming traffic.
How to Configure Port Forwarding (Network -> Firewall -> Port Forwards):
Click the Add button.
Name: A descriptive name (e.g. "Internal Web Server").
Protocol: The protocol of the service (TCP, UDP, or Both).
External Zone: Choose wan. This indicates that the traffic of interest is coming from your WAN physical NIC.
External Port: The port or port range on your WAN public IP address that the external traffic will connect to.
Internal Zone: Choose lan. This indicates that the destination device is on your LAN physical NICs (in the br-lan bridge).
Internal IP address: The private IP address of the server/device on your LAN. Make sure this device has a static IP address or a DHCP reservation.
Internal Port: The port on the internal device to which traffic should be forwarded. Often the same as the External Port.
Click Save and then Save & Apply.
Port Forwarding and Firewall Interaction:
When you create a port forwarding rule, OpenWRT automatically generates the firewall rule needed to allow that specific traffic to flow through the wan zone to the lan zone.
In practice:
The port forwarding rule tells the router to rewrite the destination address of packets arriving on the WAN physical NIC (wan zone) that match the External Port, directing them to the specified IP address and port on the LAN (lan zone).
The firewall, recognizing that there is a valid port forwarding rule for that packet, allows this specific traffic (now rewritten) to cross the barrier between the wan zone and the lan zone, despite the default wan -> lan policy being blocking.
There is no need to create a separate "Allow" firewall rule in the wan zone for incoming traffic that is handled by a port forwarding rule.
5. Other Useful Configurations (x86-based)
Wi-Fi Configuration (Network -> Wireless): If your x86 hardware includes an OpenWRT-supported Wi-Fi card, you can configure your wireless networks here (SSID, password, security). The wireless interface will need to be added to the br-lan bridge (to integrate it into your LAN) or to a separate bridge/interface for a dedicated guest network with specific firewall rules.
Changing the Root Password (System -> Administration): Make sure you have set a strong password to access LuCI and via SSH.
Updating Firmware (System -> Flash Firmware): Keeping OpenWRT up to date is crucial for security and to benefit from new features. Update procedures on x86 may vary (may involve writing a new image).
OpenWRT on x86 hardware gives you granular control and potentially high performance for your home or small office network. Understanding how to map your physical network cards to OpenWRT's logical interfaces is a critical first step. Next, you can leverage the power of the zone-based firewall to define strong security policies and use port forwarding to make internal services accessible from the outside, all with well-defined and automated interaction between port mappings and firewall rules. This basic setup gives you a solid foundation to explore the many advanced features that OpenWRT offers.


Leave a Comment